Pages

Showing posts with label tutorial. Show all posts

Saturday, July 21, 2012

Pastel rainbow & polka dots

I has new nails! Even though school has already started and I'm not supposed to wear nail polish, its my last year in high school so I should break at least some rules in the wanna-be-private nun girls school I go to.  But I'll probably have to hide my hands in my pocket for the next week or so from getting a detention from the cranky teachers who are constantly like 'Wear your blazer to and from school, girls!', 'Where's your uniform pass?', 'Where's your late pass?' blah blah I think you get the gist of what my school's like #rebelliousteenager

Since I bought the both the mint and yellow recently, I thought it was a great time to paint my nails into a rainbow and to jazz it up with a bit of fun I added polka dots :)

Here's what I used:
- Cutex base coat
- Cutex top coat
- Sally Hansen 'Made you blush'
- Essie 'Haute as Hello'
- The Face Shop 'YL701'
- Skinfood 'BL005'
- Missha 'BL001'
- Etude House nail art pen (white)
- Daiso nail drying spray

I don't think I need a thorough tutorial, basically just paint your nails to achieve the colour and transperancy you want, draw dots on your nails with either a dotting tool or the dotting pen I'm using, seal your nails with a good coat of top coat and you're done!  The base coat and nail drying spray are optional, however if you're impatient like me then I suggest you get one of these nail drying sprays from Daiso to help speed things up.

Hope you liked this short update of my current nails, don't forget to check out my blog giveaway! Bye
click on me to go to the giveaway   

Tuesday, June 5, 2012

Tutorial: floral projects

I redecorated a few items which all ended up being floral themed, this included an accessories stand and a tissue box which I later turned into a box.  The box that I deco-ed is my first deco project, so I'm very proud of it (even mum was like wow so pretty), here are the final products:


How to make/customise a box:

Find a box or container you no longer use (preferably clear), here I'm using a tissue box that mum bought years ago


(optional) place a piece of cardboard on the lid and glue it down to cover up the hole, then give it a light coat of white paint.


Prepare your deco parts, I chose artificial flowers, lace, pearls, rhinestones (I didn't use some of the things pictured below) and glue

Position your main pieces on your box, and glue them down once your design has been confirmed

 Added a line of this 3D decoration pen along the edge to give it a neater look link

Glue lace around the inside of the box, yes the inner lid is very attractive  :P

Keep on gluing the deco parts on until you have covered the lid, this may take a few long hours, and you're done!


 Now onto the accessory stand that I customised, at first it was this blue stand with a cat head on it and becaused it didn't really match my room I decided to give it a makeover.


Sawed the cat head off *evil laugh*

Sanded most of the blue paint off so the paint would adhere better

Gave it a  few coats of white (acrylic) paint

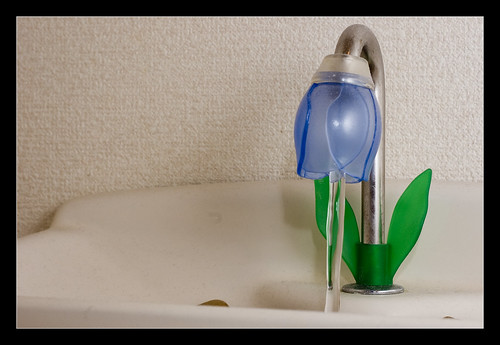
Painted it green, and put this flower thing for taps from Japan on because it was too small for our taps
credits to Google Images

and tadaa I has a new flower accessories stand lol


I guess this post fits today perfectly since it's World Environment Day, reduce reuse recycle!

Hope you liked this tutorial, bye
Related Posts Plugin for WordPress, Blogger...